End-User Documentation
The purpose of this user manual is to describe the overall workflow that will be supported by MORe, the LoCloud aggregator. This workflow comprises of a number of distinct steps and its goal is to guide the user in order to publish a package to Europeana.
Brief Overview of Workflow
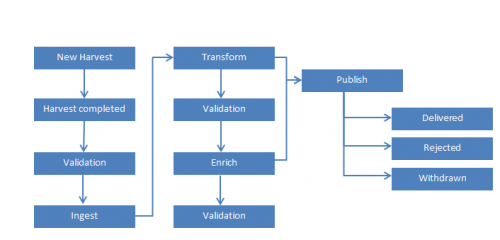
- Make a new harvest by creating a new metadata source.
- A new package is then created. The package is ready to be harvested and automatically validated.
- After the harvesting, the package can be ingested.
- Next step is the transformation to EDM; if the items within the package are already in EDM, the transformation step can be skipped.
- Once the transformation to EDM is completed, the use could enrich his/her package through the metadata enrichment services.
- Finally, the package can be published. There are three possible actions in this step:
- Deliver the package to Europeana.
- Reject the package, giving a short description for the reason.
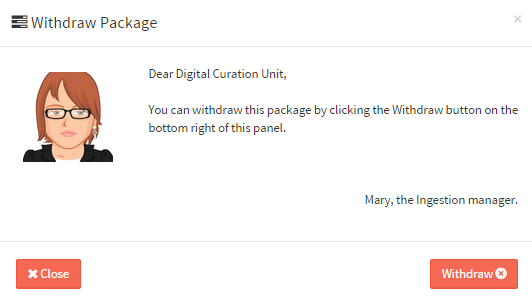
- Withdraw the package.
MORe Ingestion through OAI-PMH
-
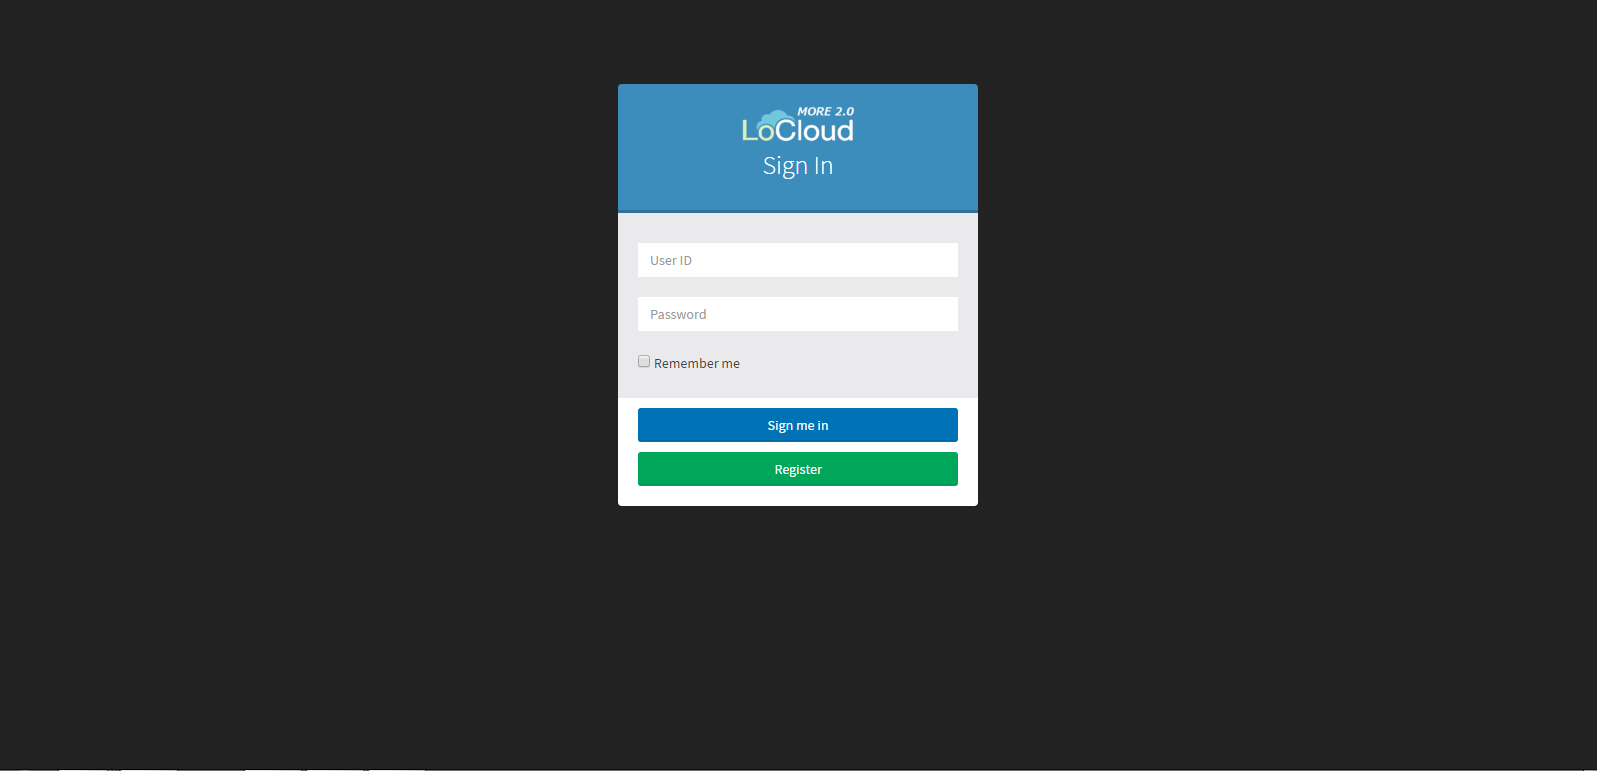
Login to System
The user has to fill in his/her username and password
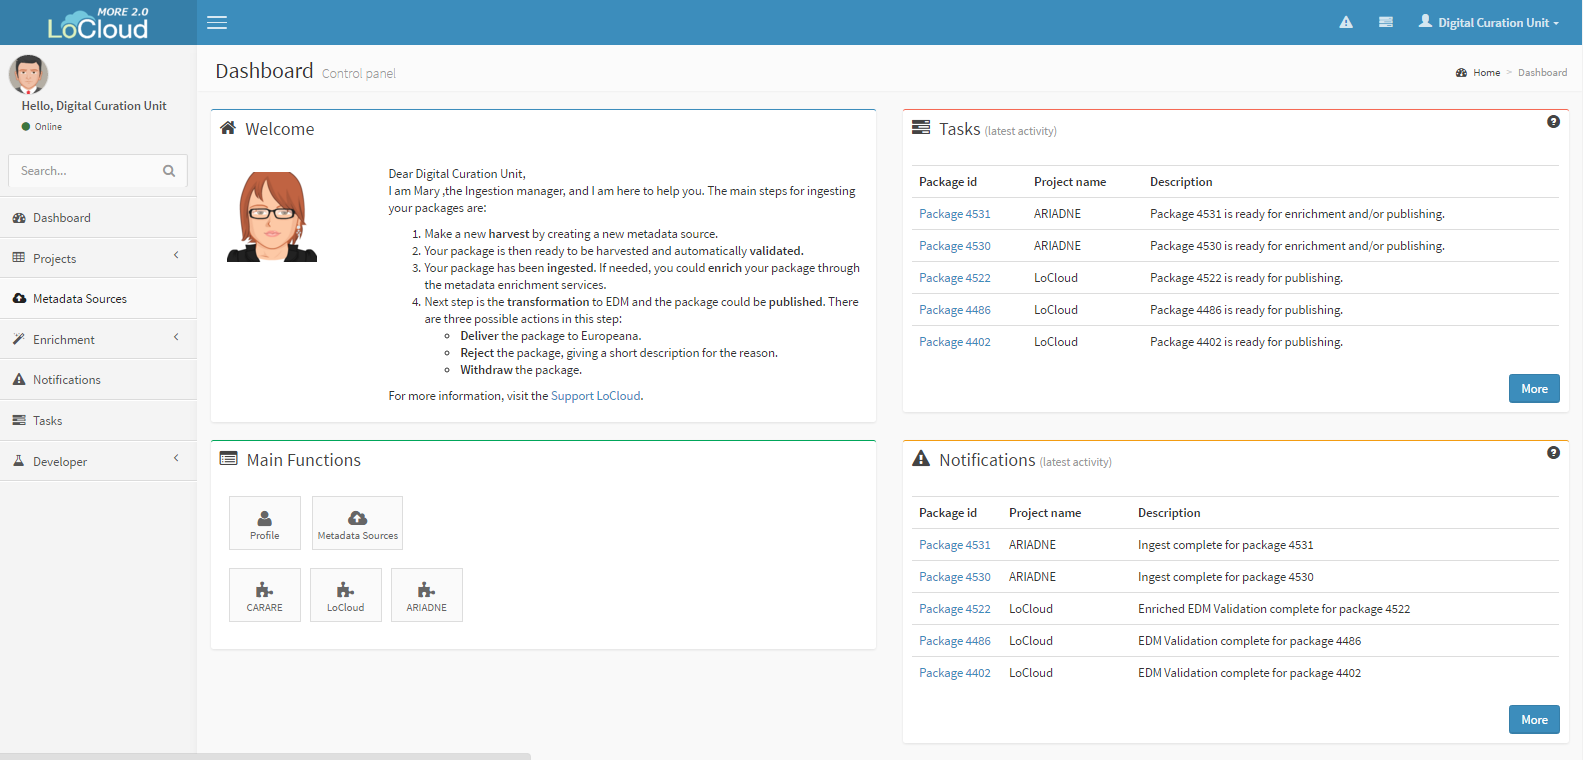
After logging into, the Dashboard with the four main widgets appears.
- Top Left: Welcome message and brief explanation of the workflow.
- Top Right: Tasks assignments. The user do not have to remember what to do next. Whenever he/she must do something new, a task assignment will be in the task section with the appropriate description.
- Bottom Left: Main functions; this can change depending on the user's credentials.
- In the notification area whenever a job finishes or fails the user receives a notification about it. The notification is accompanied by an appropriate description in order for the user to fully understand which job was successfully completed or what went wrong and the job failed.
-
Harvest
Create a new metadata source
The first step for the harvesting task is to create a metadata source, through the tab "Metadata sources" in the left menu. After this, the user has to choose the button "New Data Source". Moreover, the user has to fill in the empty fields.
The user has to provide the necessary information:
- The appropriate type/source of data.
- The project that the particular metadata source will belong to.
- The label of the new metadata source.
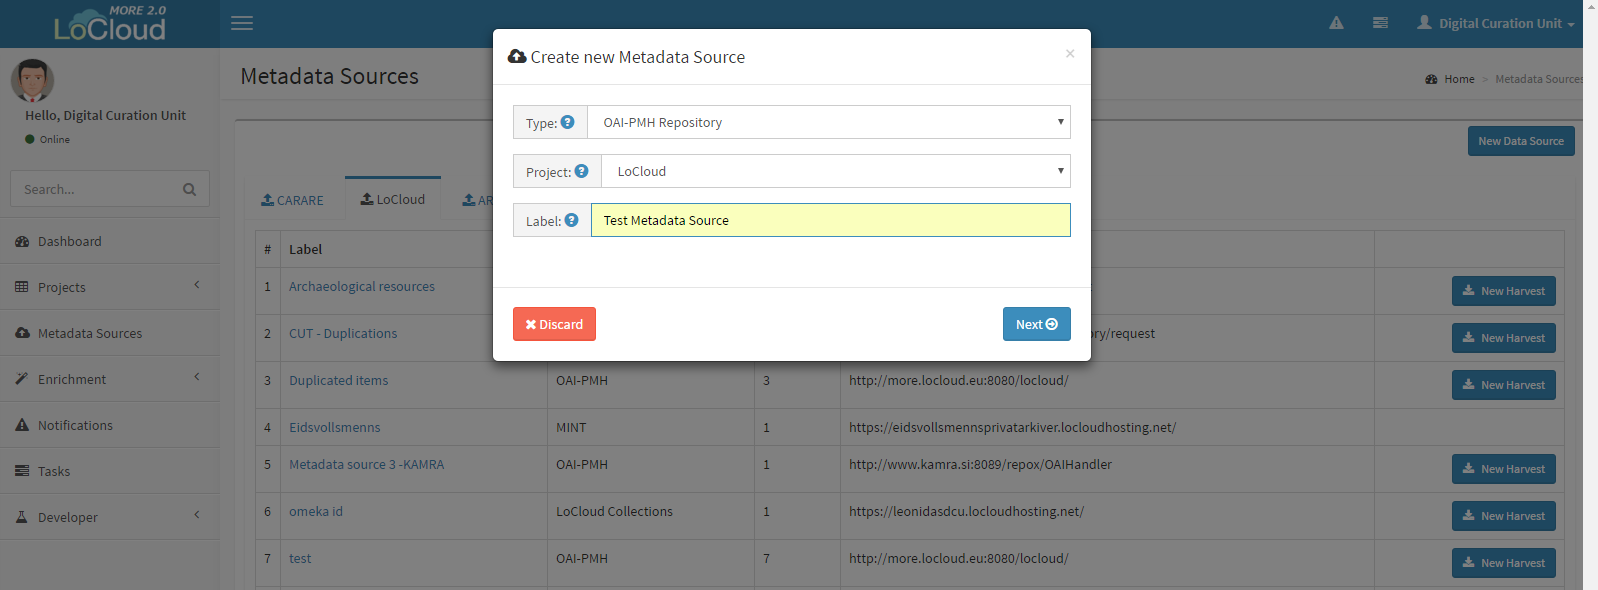
Subsequently, the user has to choose the button "Next" so as to fill in some more fields.
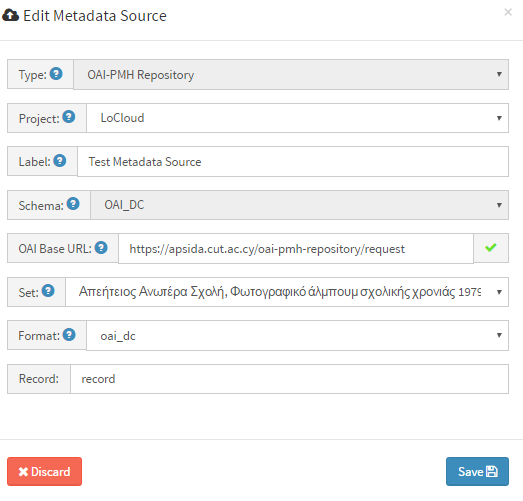
The user has to provide the necessary information:
- The source metadata schema.
- The URL; OAI URL in our case without any request statement. The user after inserting the url should validate it through

- The set that the user is going to provide for harvesting.
- The format that correspond to the above set/collection.
- Record, OAI record element which takes the value 'record'.
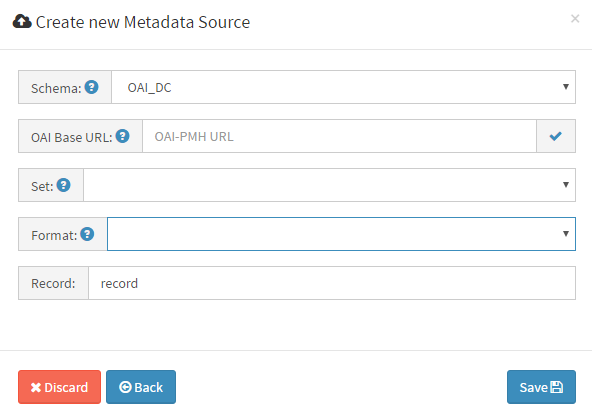
When all the necessary fields have a value, then the metadata source can be saved. After the metadata source has been saved, the user is able to edit his/her metadata source by choosing it from the list. After any changes, the user has to save the form in order to make the changes permanent.
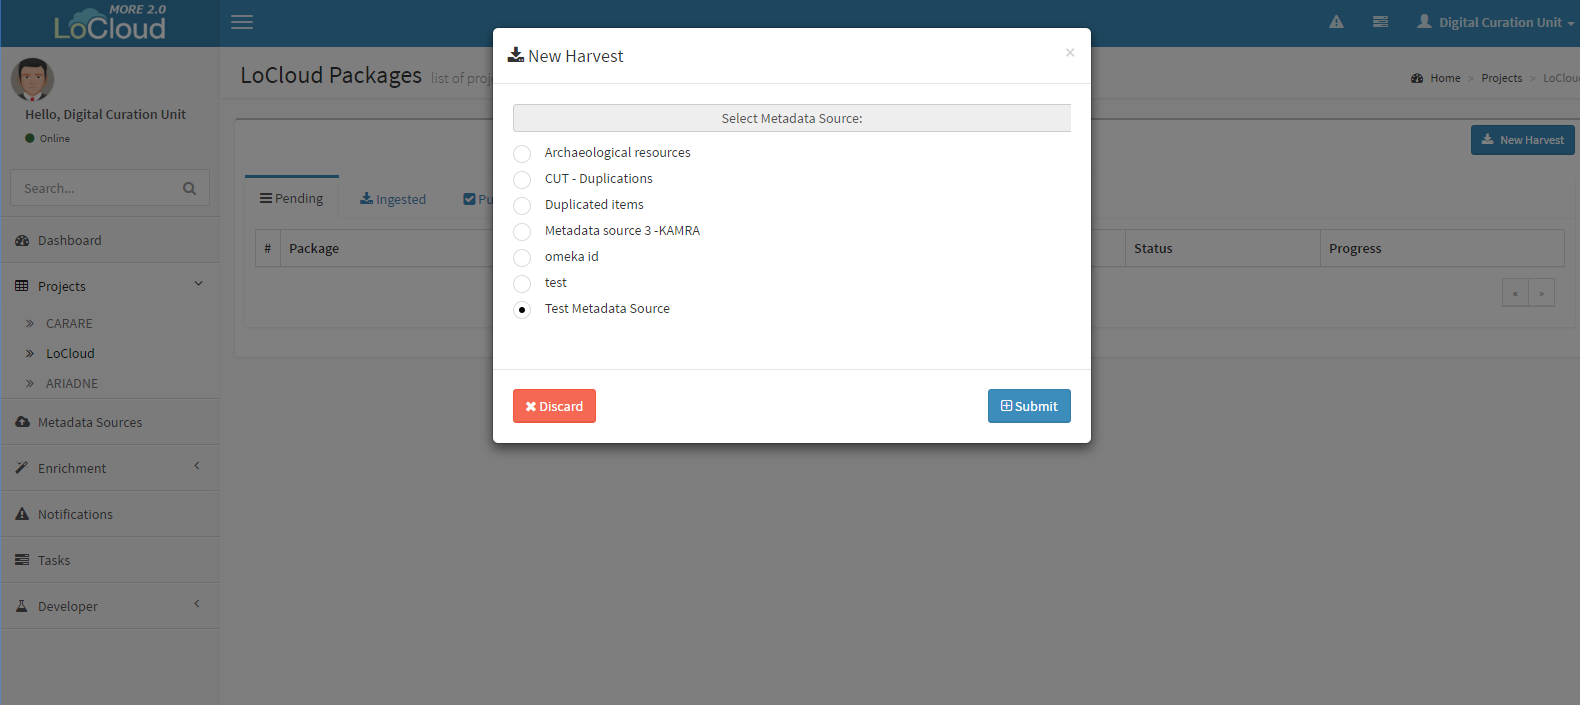
Create a new harvest
The user is now ready to create a new harvesting job. Harvesting can be done through 2 different ways:
-
After creating the Metadata Source, the user can select the button "New harvest".
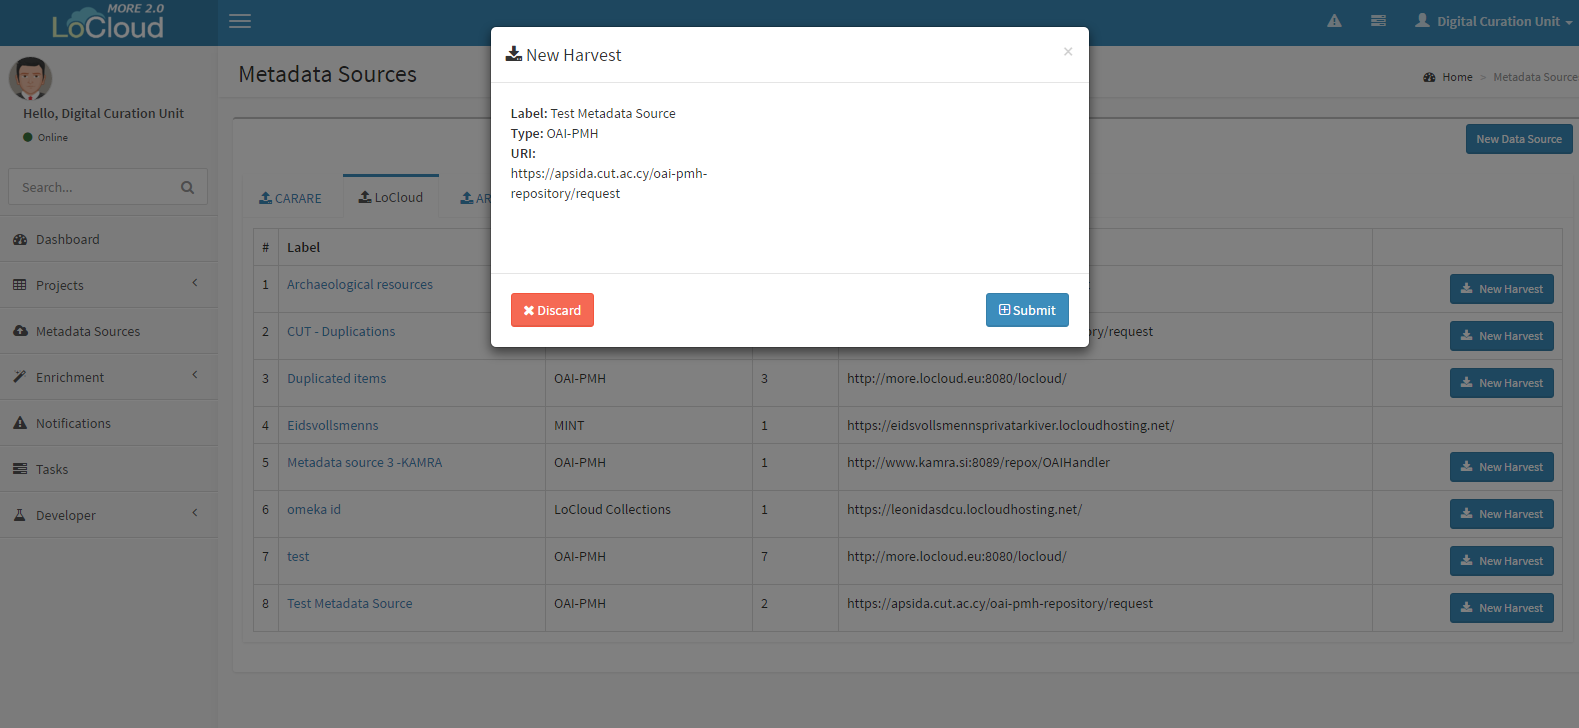
-
From the tab "Projects" in the left menu, the user chooses the project that intends to publish the dataset, chooses the button "New harvest", selects the appropriate metadata source and submits it.
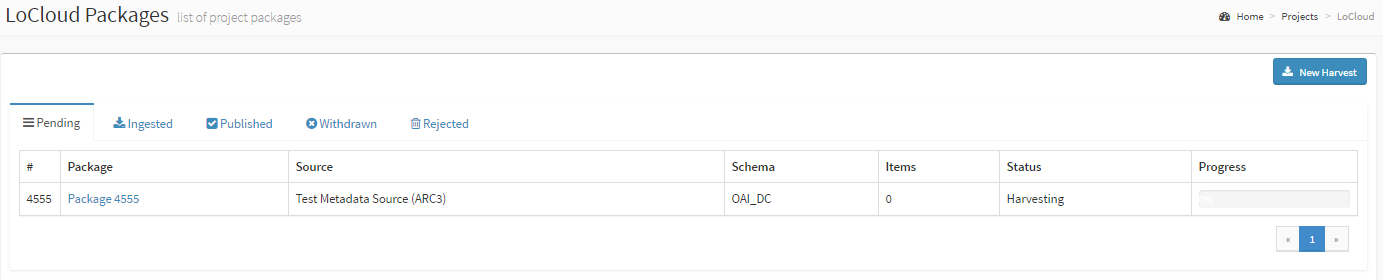
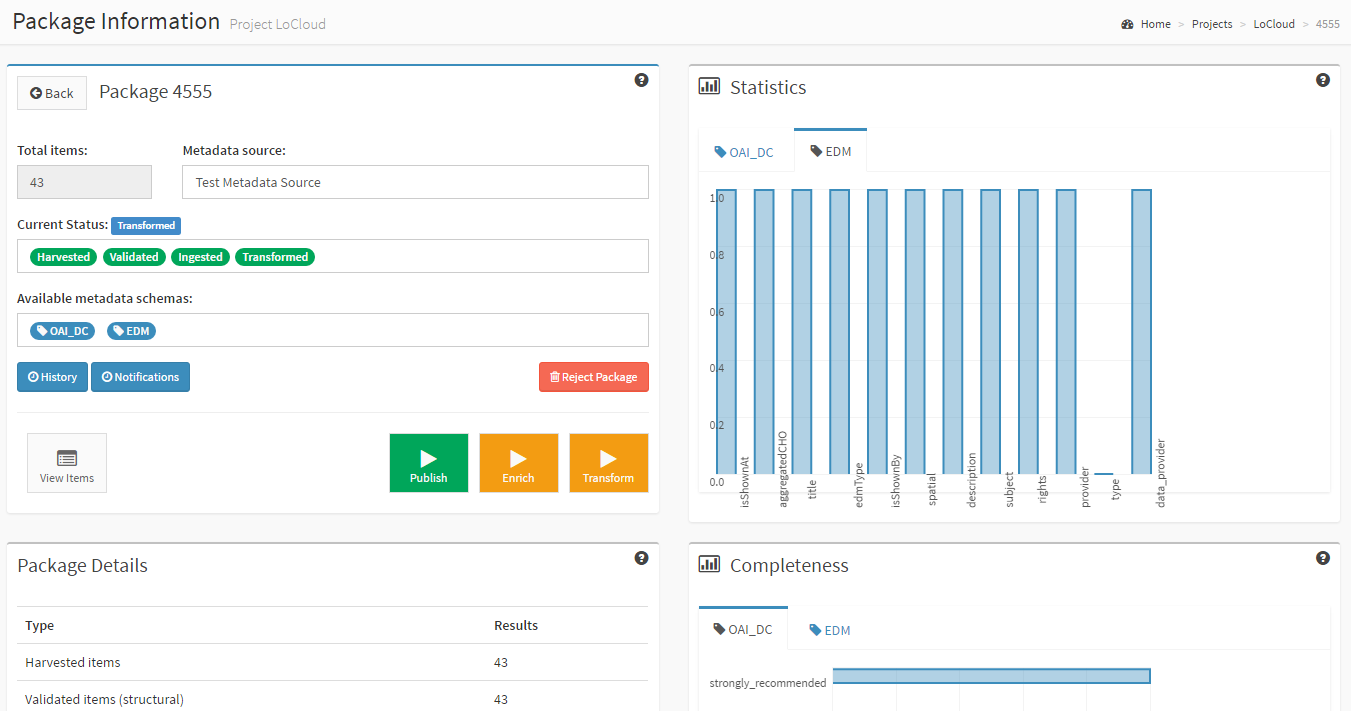
After submitting the form, a new package is created (with a new id). The package is shown in the "Pending" list (tab "Projects", projects "LoCloud"). The package is received and validated, so as the harvesting to be completed. The user is able to see all the packages in a list, as it is shown below. This list describes the package id, the metadata source, the schema used in the source, the number of items that it contains, the status and the progress. In each one of tabs, the user can see the respective packages of this status (pending, ingested, published, withdrawn and rejected).
-
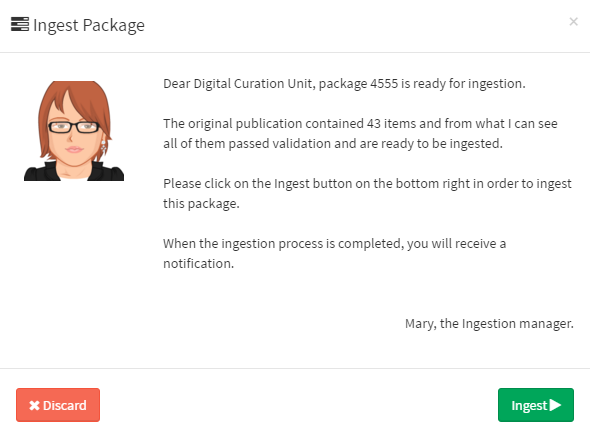
Ingest
Provided that the harvest is completed, the package can now be ingested. The user is informed to ingest the package through the task assignment with a relevant message. Please note that you are not able to see the content of the harvested items before the completion of the ingestion. The user can ingest his/her package by simply selecting the "Ingest" button.

-
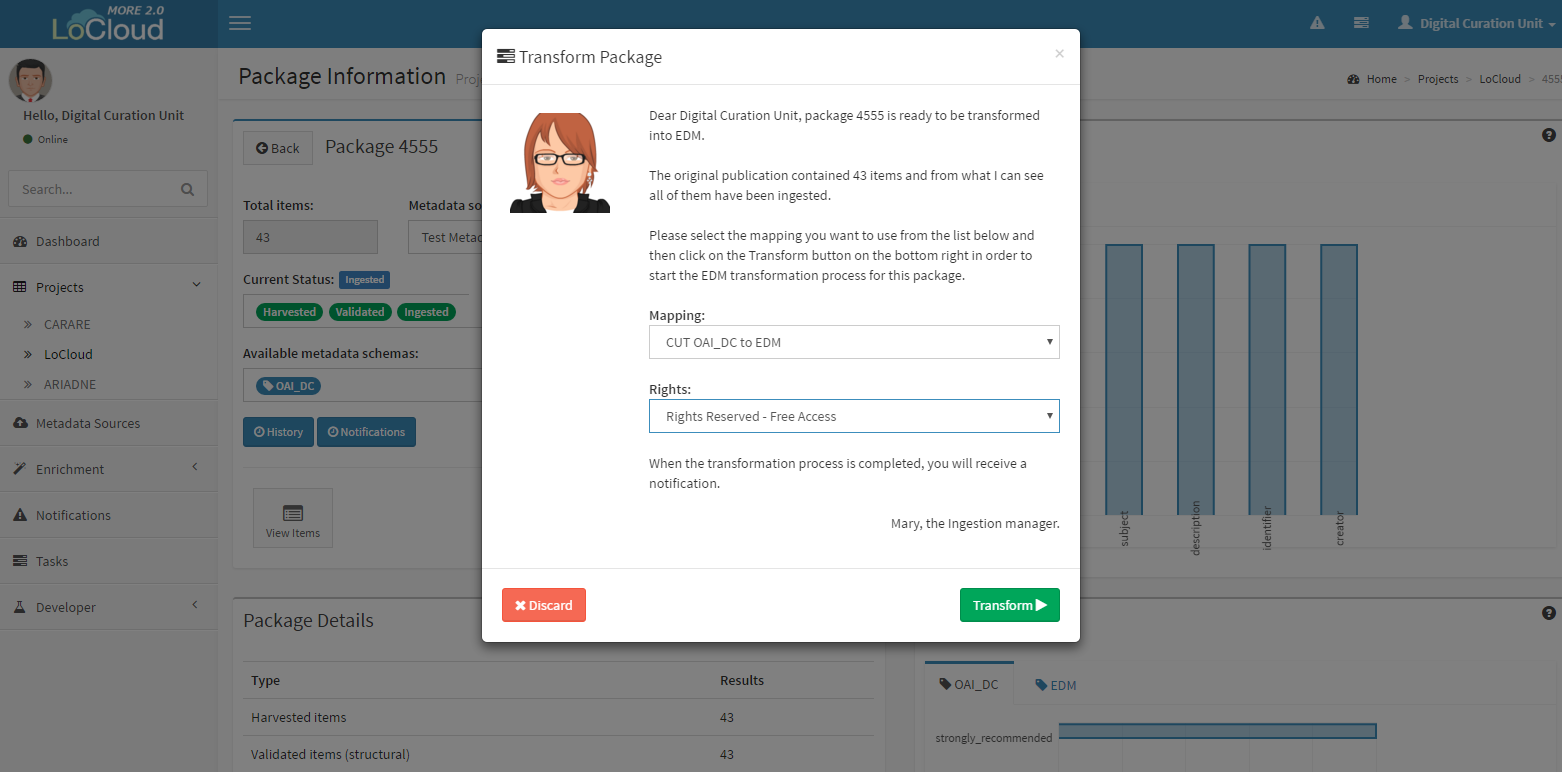
Transform
The package after the ingestion should be transformed to EDM provided that the schema used in the package is one of the intermediate schemas. In case that the native schema is EDM, this step is omitted. The task manager informs the user about the details of the transformation, from which EDM records of the package will be created. For the transformation process, the user needs to provide the following information:
- Mapping: the user has to choose the appropriate mapping by taking into account the native and target metadata schema. The mappings are predefined.
- Right Statement: the right statement is essential. If the right statement is not provide with your schema, you have to attach one.
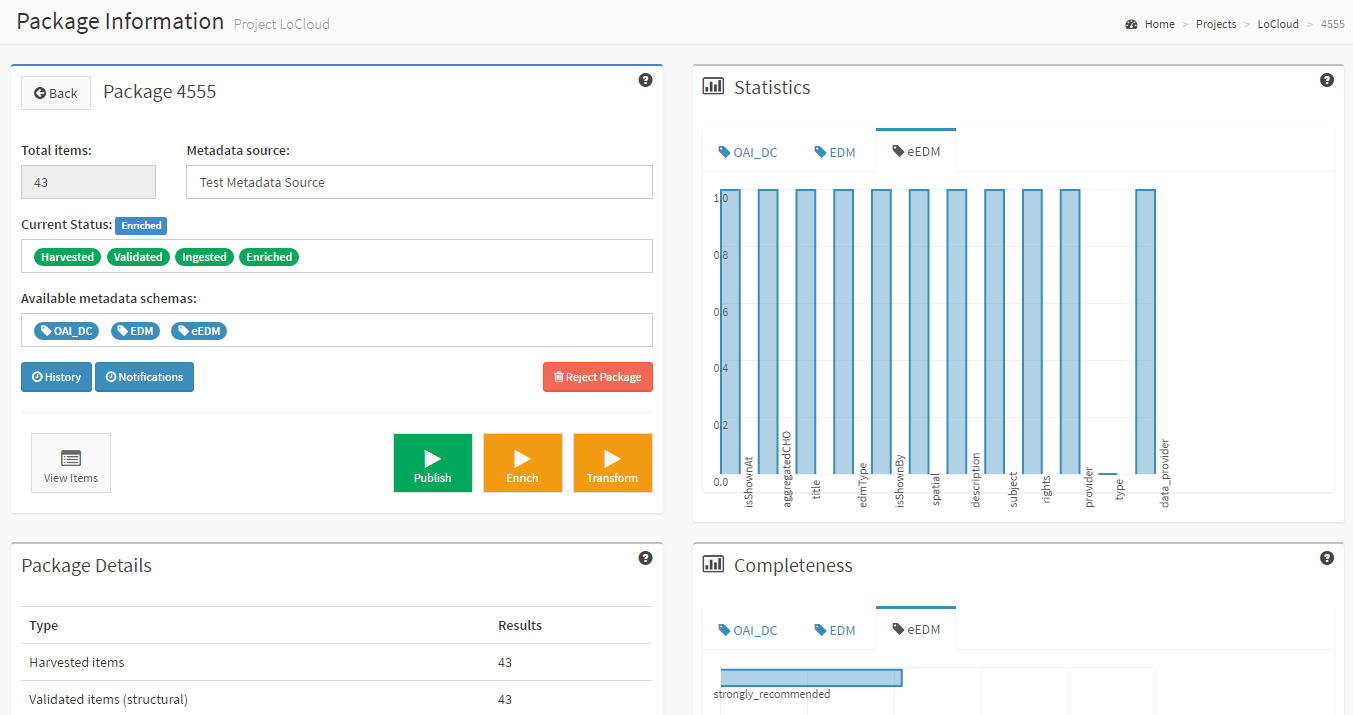
Once the transformation is over, the user can see that the available metadata schemas are now two. Now for each item there are two metadata records, one in the native metadata schema (OAI_DC in our case) and a second one in EDM.
-
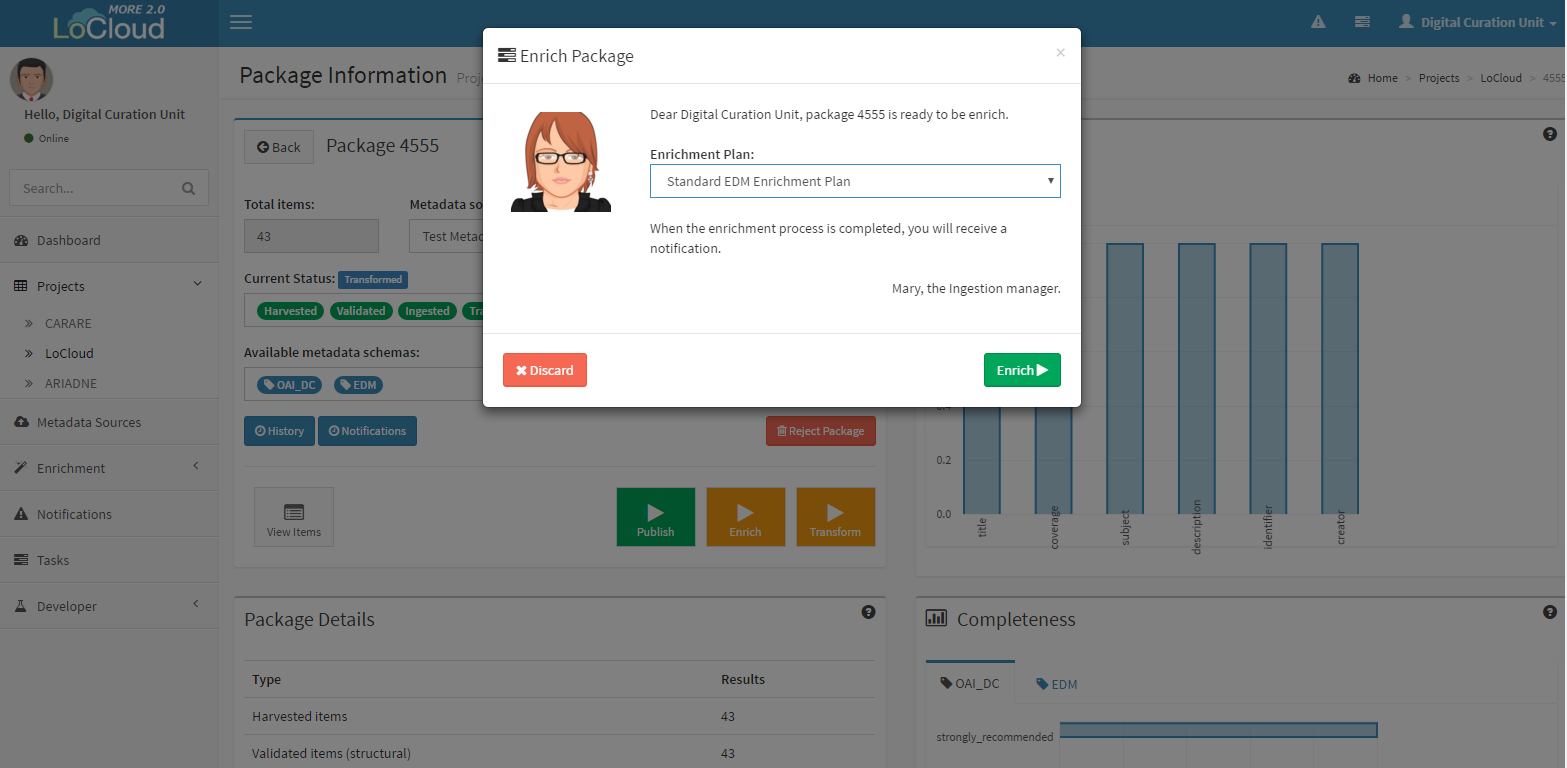
Enrich
Once the package has been transformed to EDM, the user can use a number of enrichment micro-services in order to enrich the records. Firstly, the user has to make a new Enrichment plan or use an already existing one. In the left menu, choosing the tab "Enrichment" and after this the "Enrichment Plan", the user can create a new plan or edit an existing one.
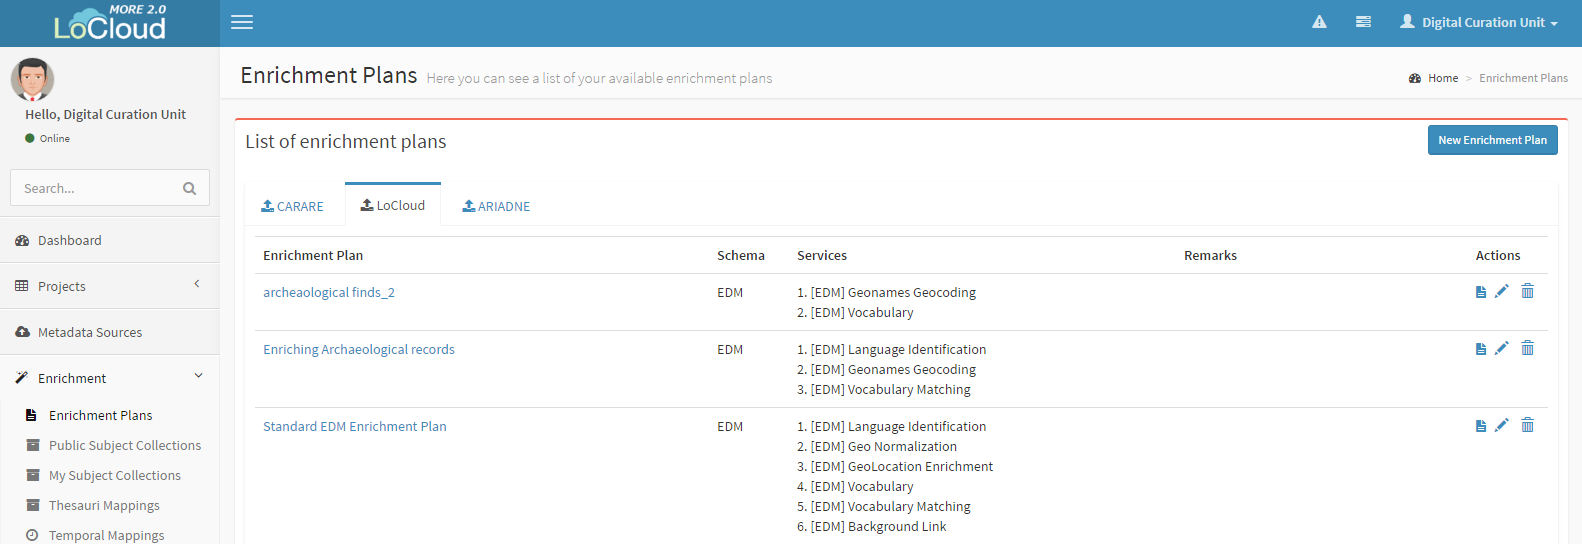
The user can create a new enrichment plan by simply clicking on the "New Enrichment Plan" button and filling in the fields.
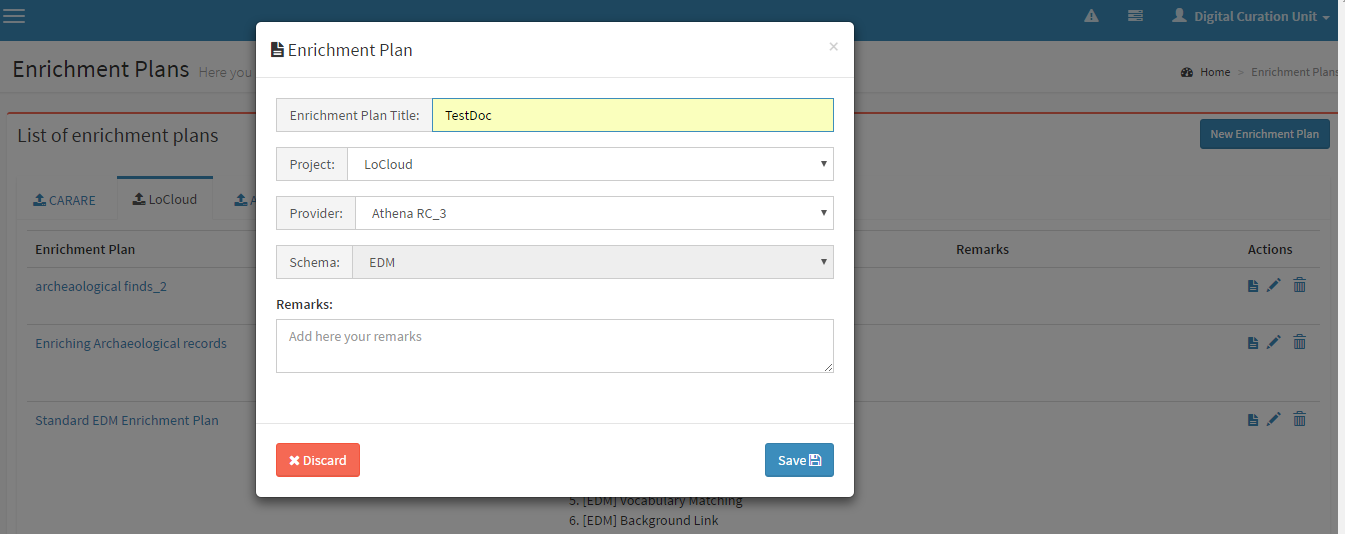
Next, the user can add to the Enrichment Plan the services he/she considers essential.
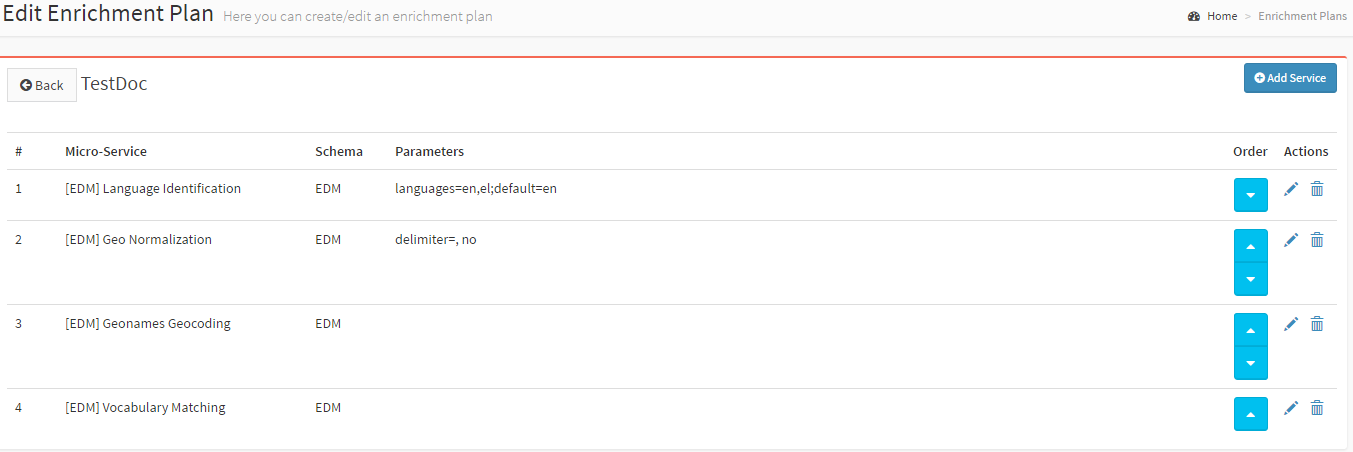 Once the user has his/her enrichment plan, he/she can continue with the enrichment.
After enrichment, for each item in this package there are three different metadata records. Specifically, there is a metadata record for each metadata schema namely, native metadata schema (OAI_DC in our case), EDM and Enriched EDM (eEDM); in the case where the native scehma is EDM then the available metadata schemas will be only two, namely EDM and eEDM.
-
Publish
The package now contains both the native.xml (CARARE, OAI-DC, among others),the edm.xml and the enriched edm.xml. The user has to select in which schema (EDM or enriched EDM) wants to publish the records. Currently, the user has three different options:
- To publish the package to Europeana.
- To download the package as compressed TAR Archive.
- To do both.
 After publication, there are three possible actions:
-
The package to be harvested by Europeana in its next harvest. Please note that this can take up to one month. Once the package is harvested the user will receive a notification. If Europeana rejects the package, the user will also receive an appropriate feedback explaining what led to the rejection.
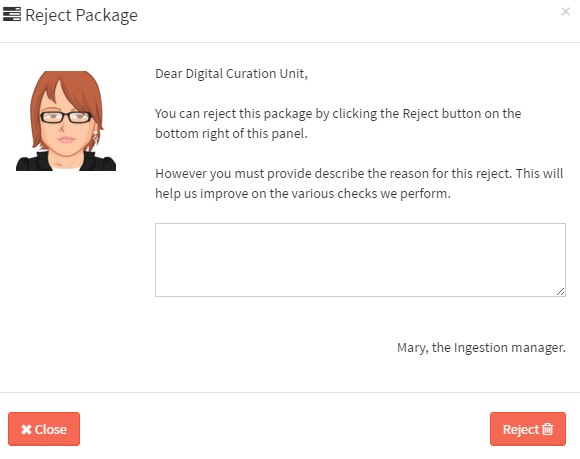
- To reject the package. However, the user must provide a short description for the reason of this rejection.
- To withdraw the package.